Custom Field Swimlanes
Introduction
If you want to plan iterations across multiple projects, chances are you are using a custom field with options to map iterations or releases to the issues.
In this guide you will learn how to create a suitable custom field and use it on the map
Creating the custom field
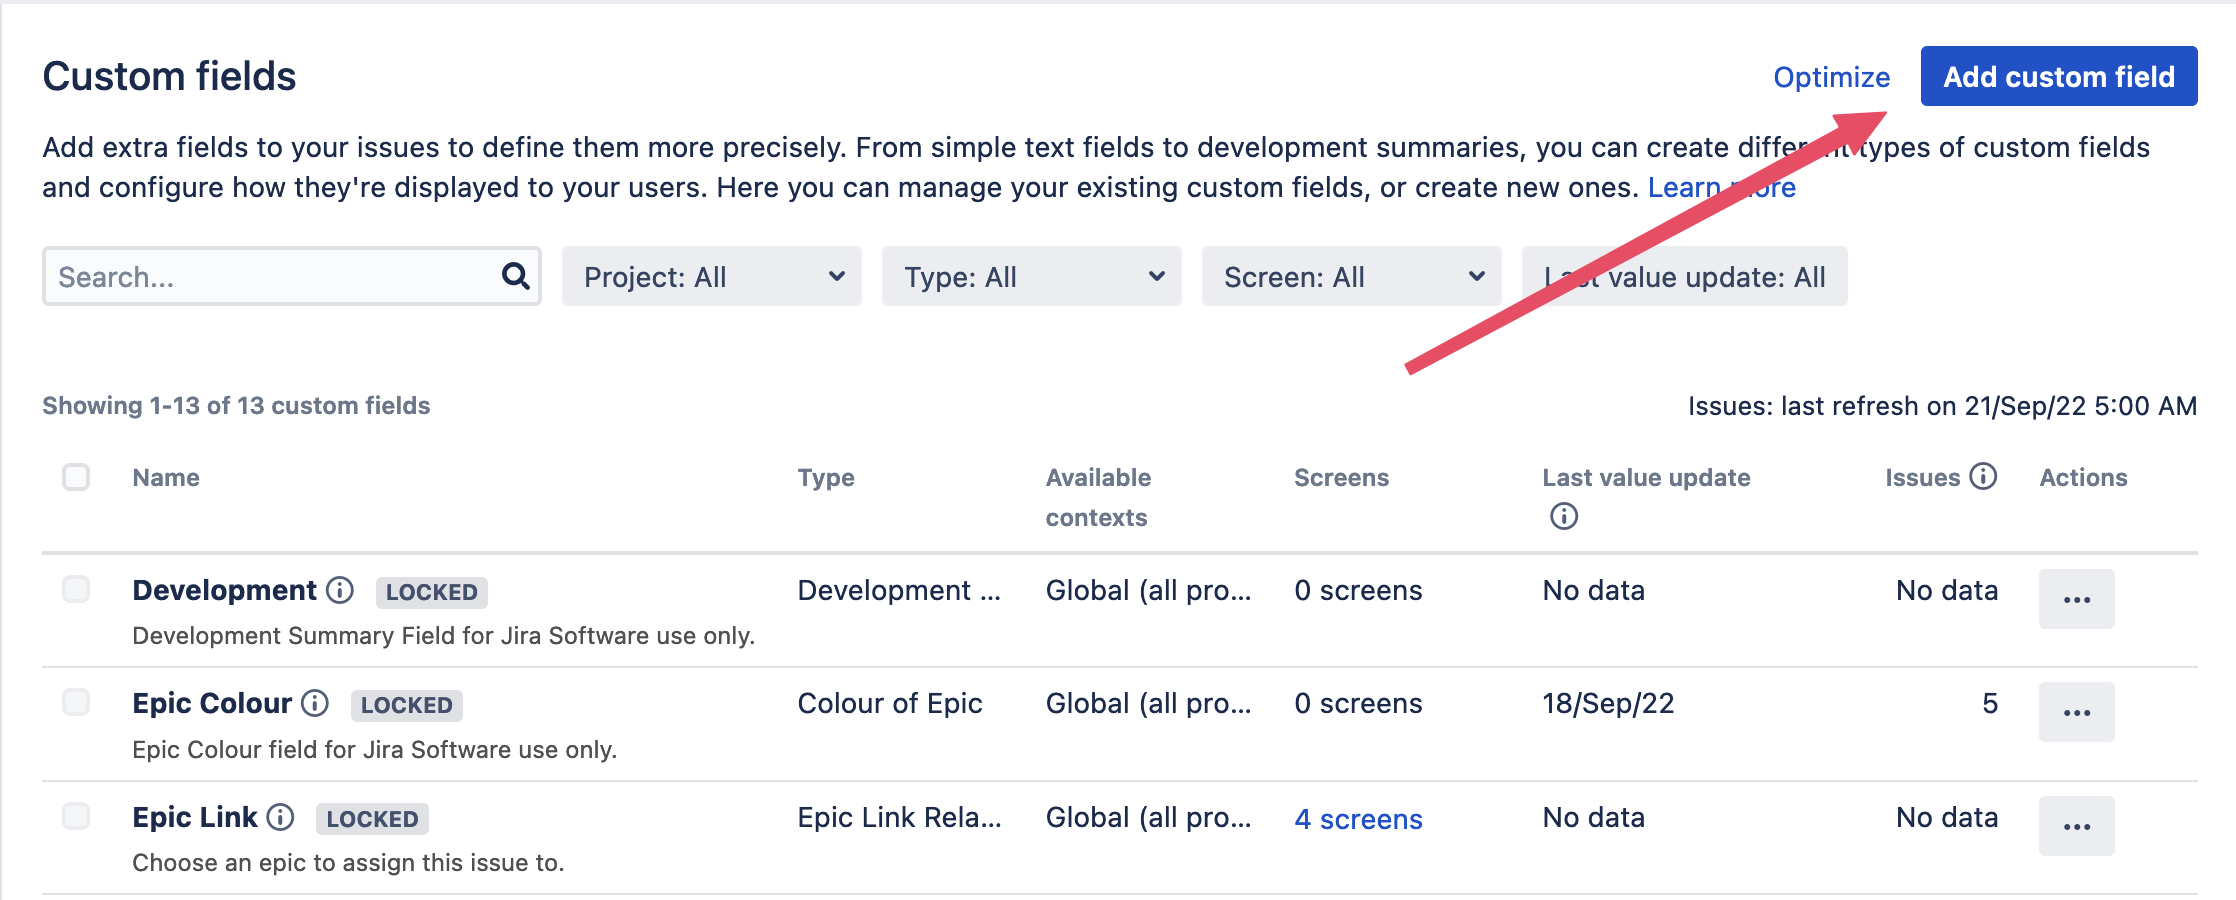
Go to the Jira Administration -> Issues -> Custom Fields and add a new custom field.
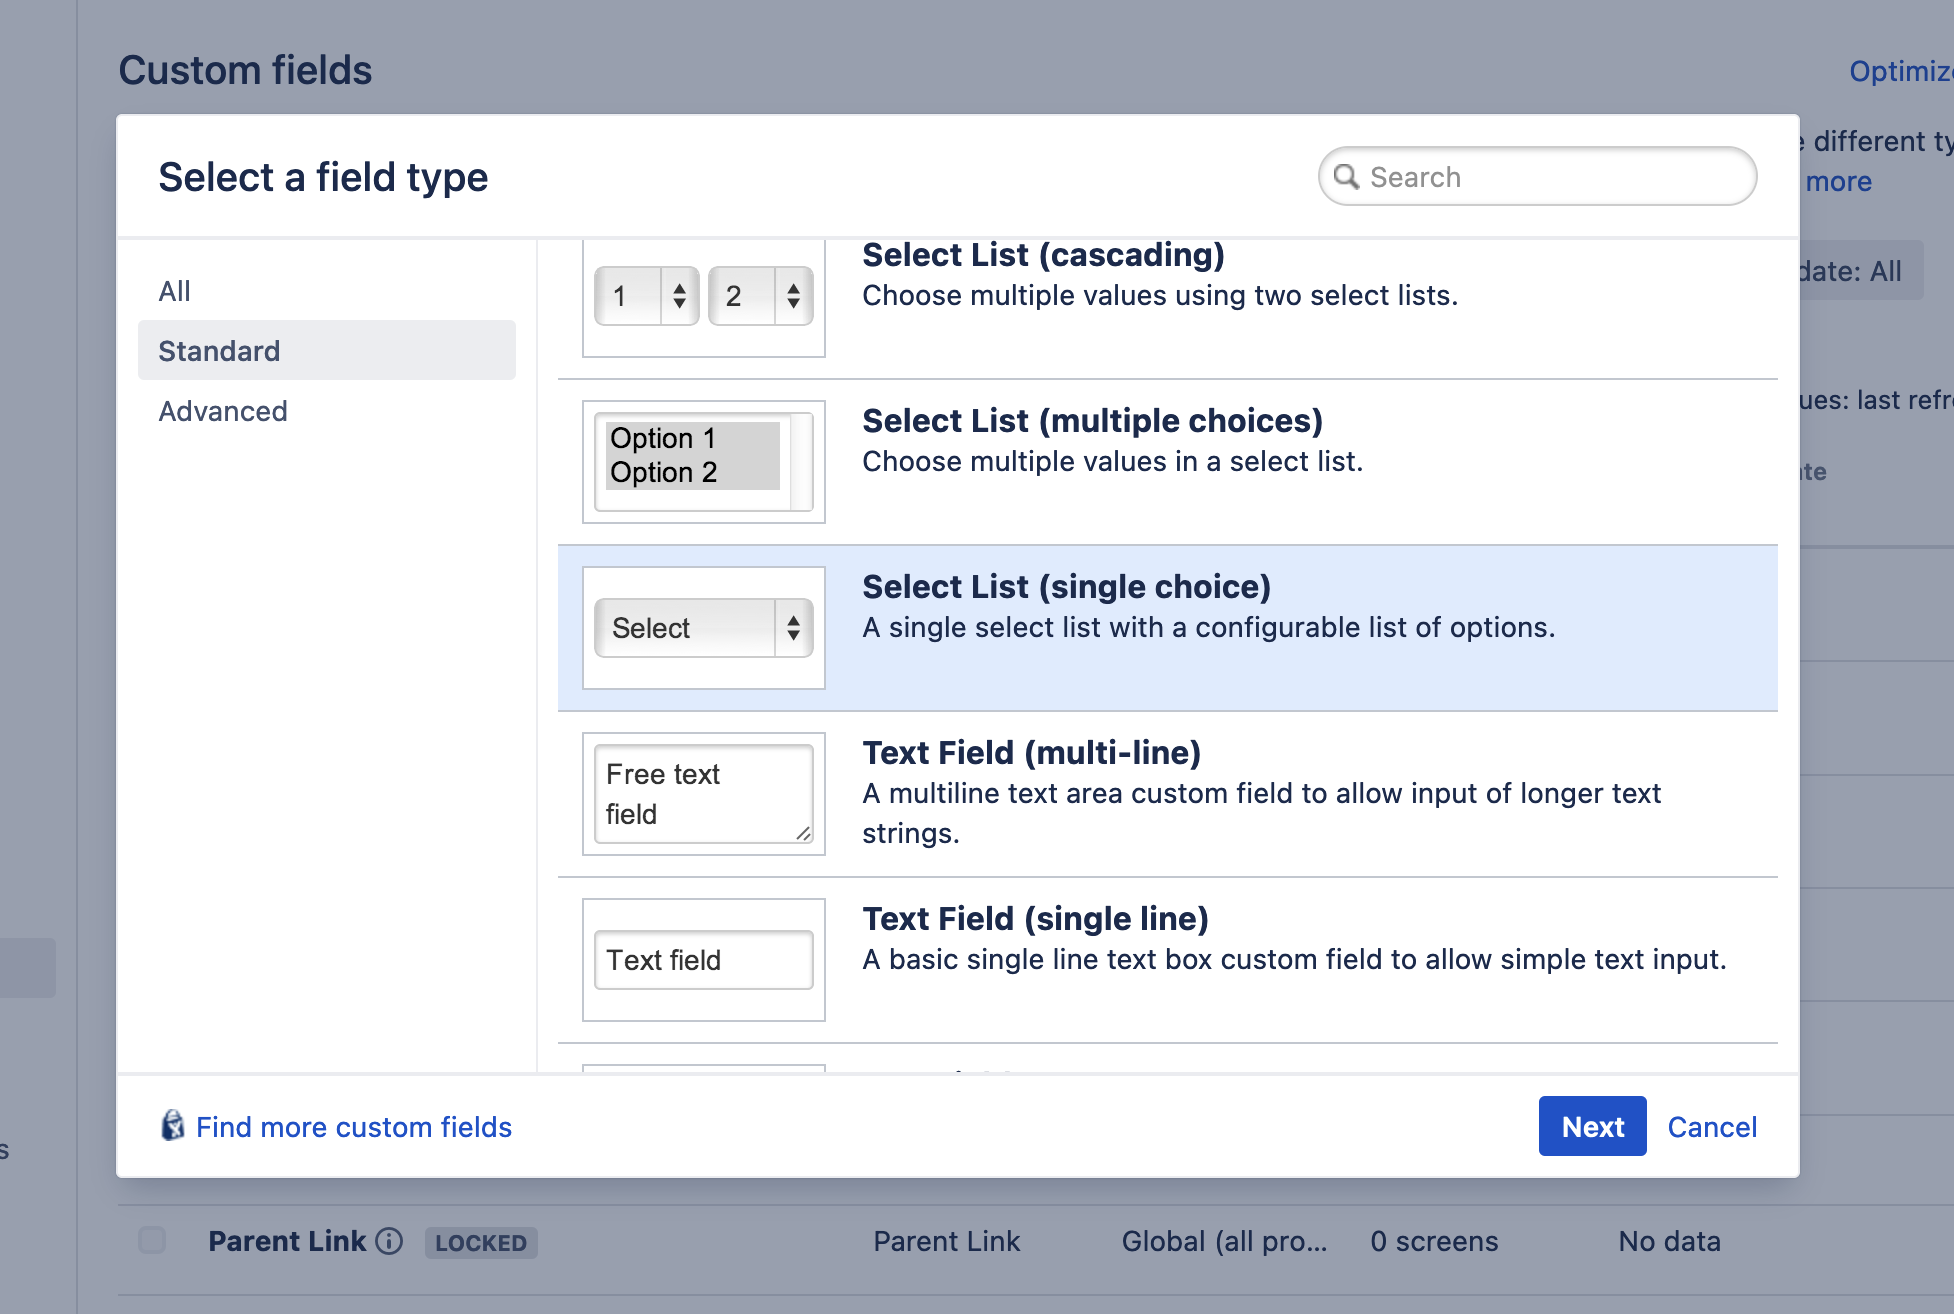
The custom field can be either type radio box or single select field. Notice that we do not support multi-select fields or check-boxes because the map would display issues in multiple swimlanes and it would cause problems when moving the issues to a new swimlane.
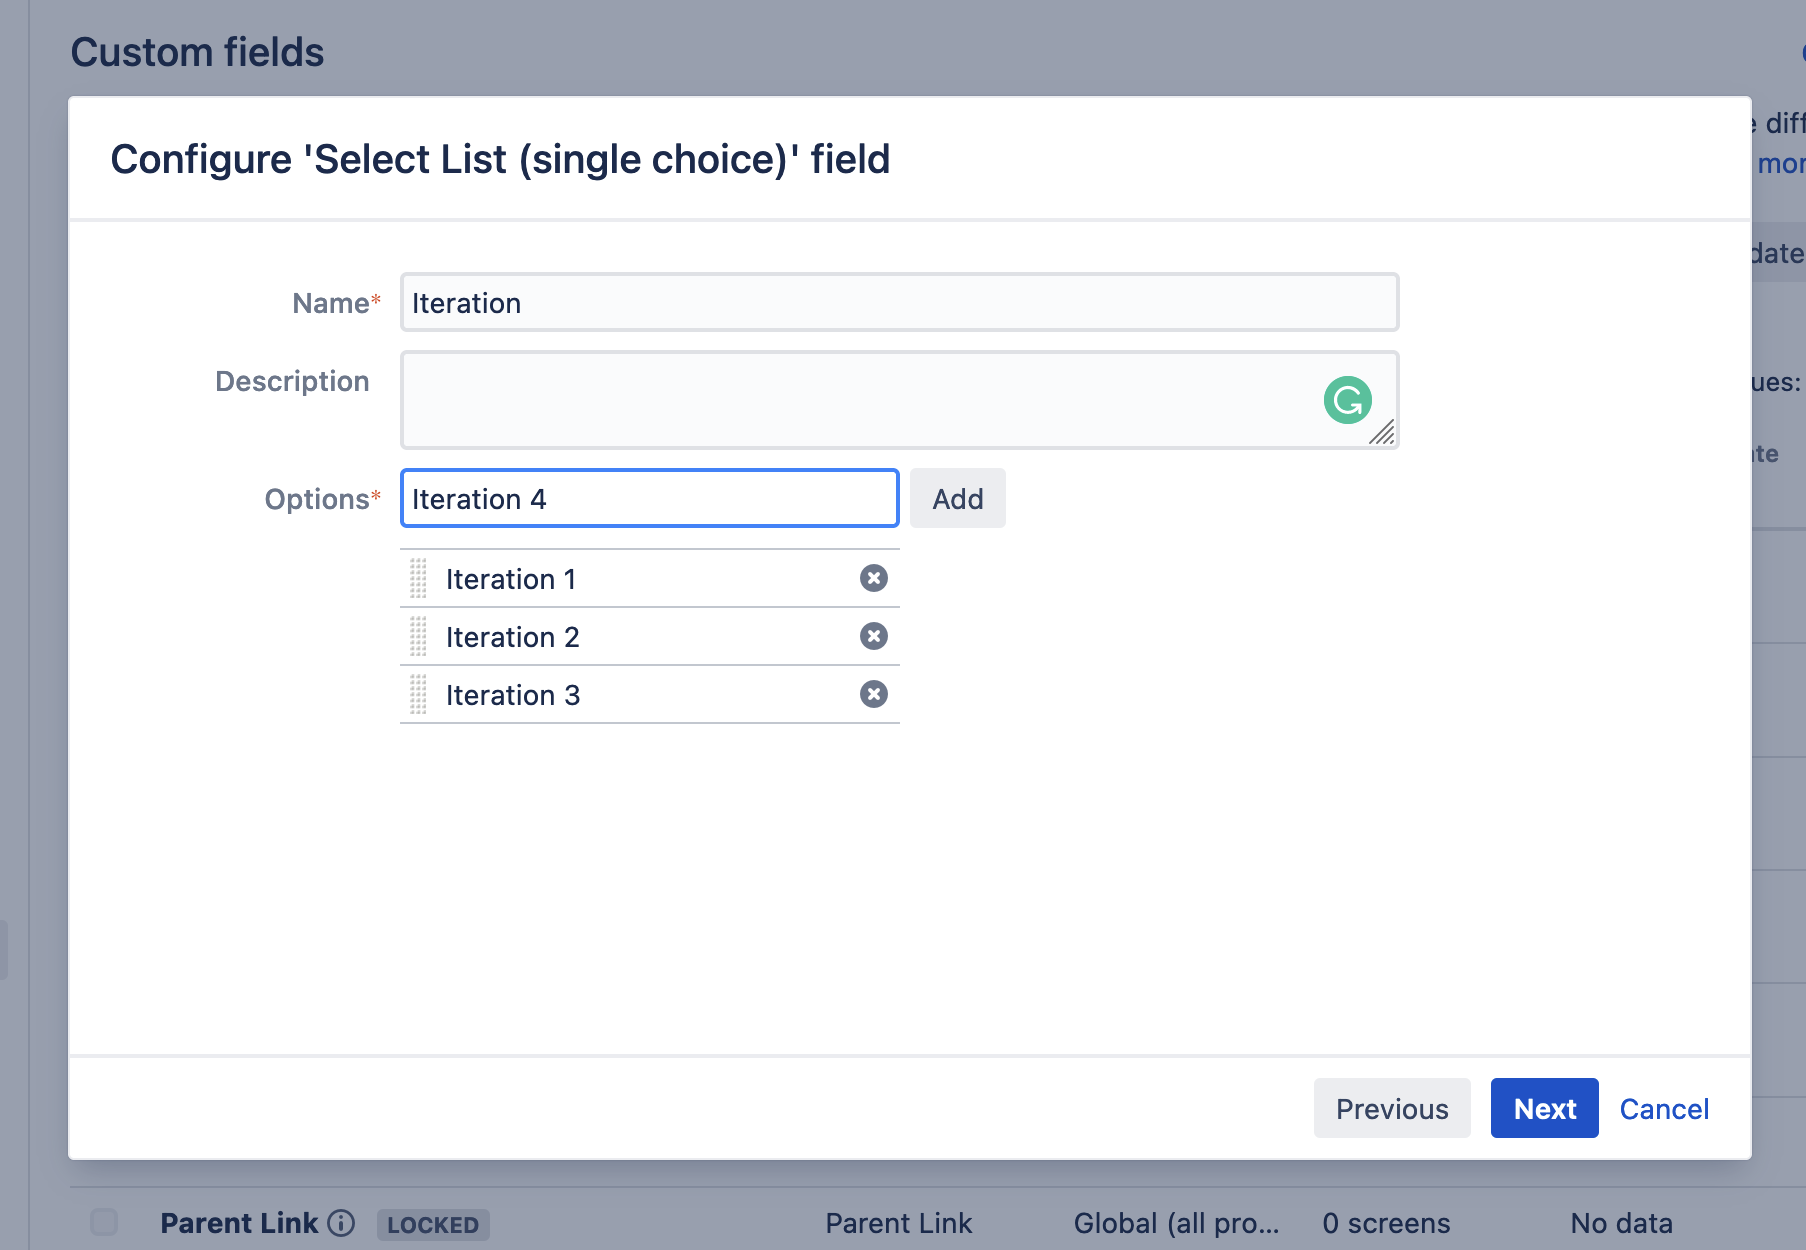
You can add options right away from the create dialog. You can also add these or update these options later. The map will always be up-to-date with these options. In this example we will use "Iteration" as the custom field name. This scenario is mostly suited to scaled agile frameworks.
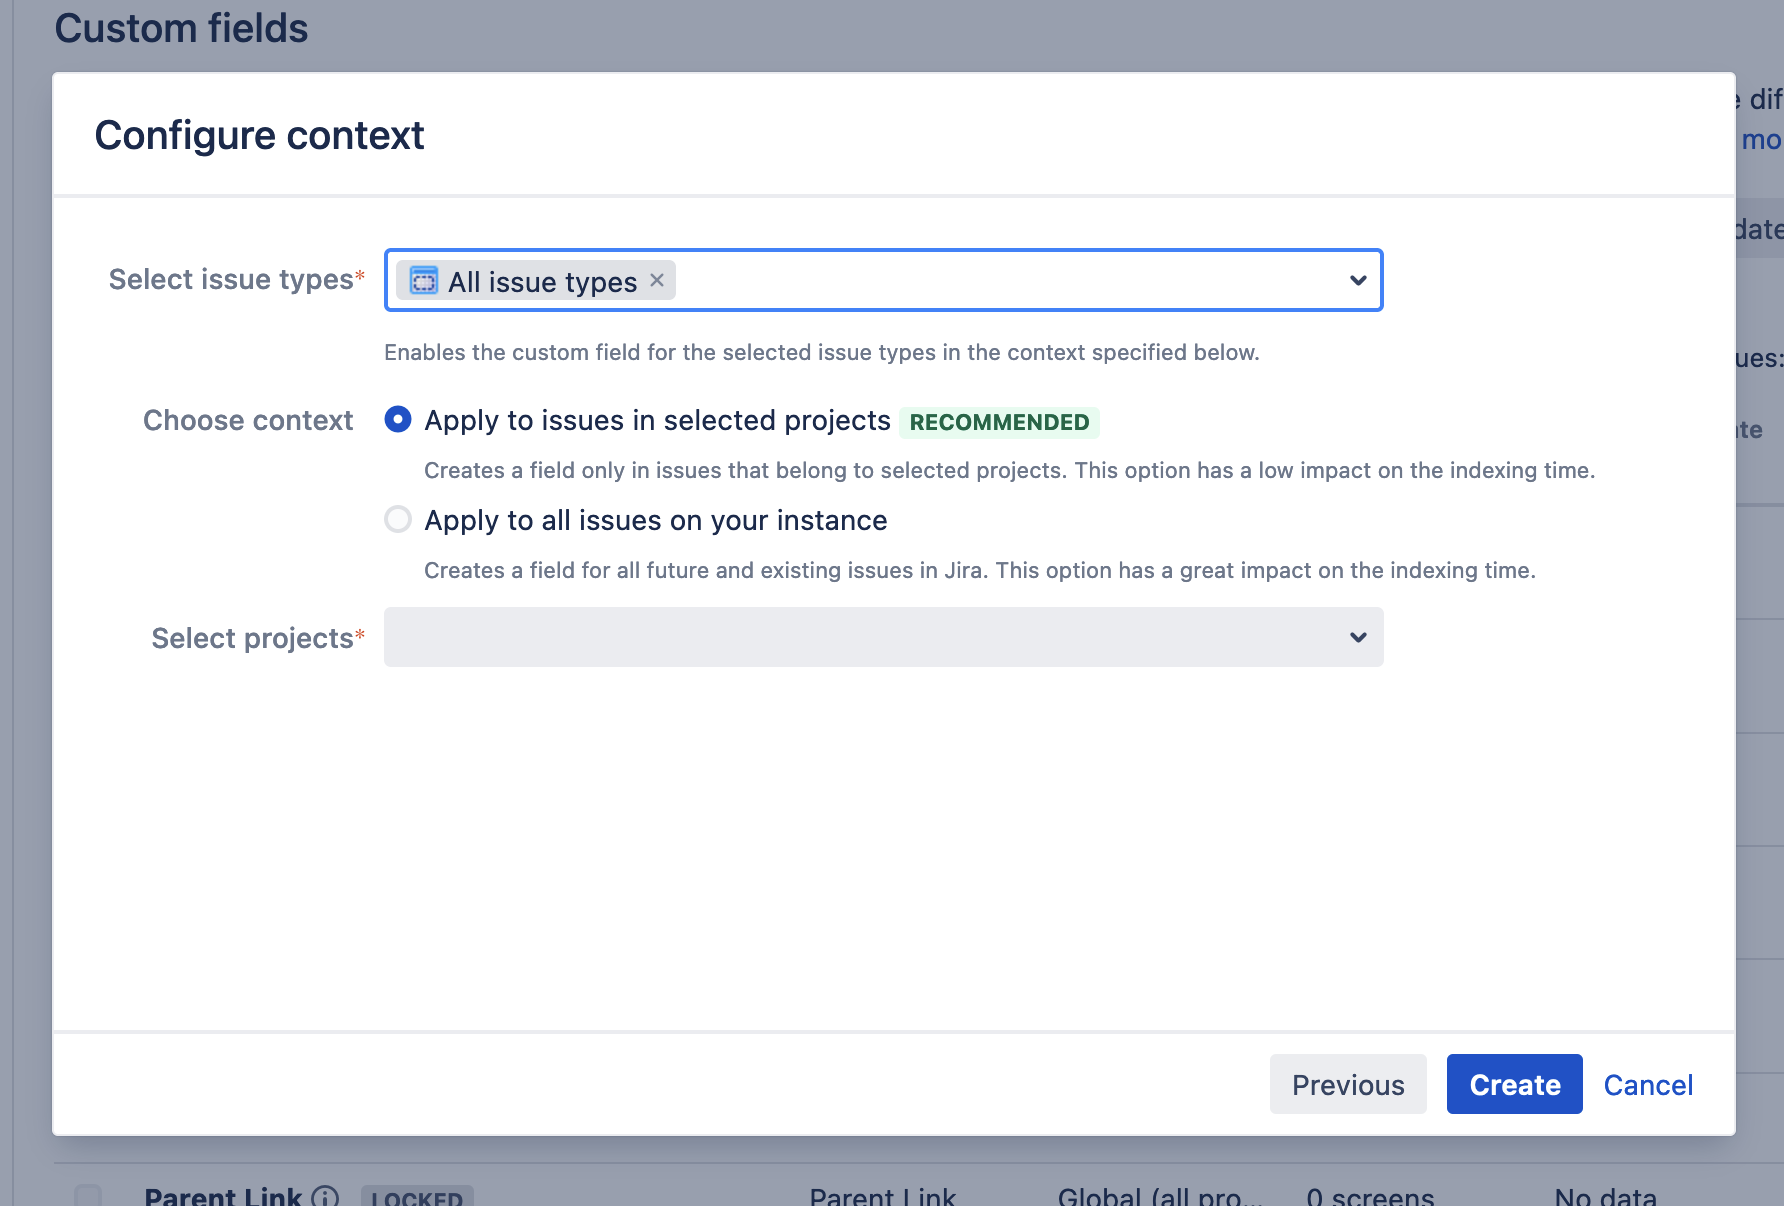
In the next screen, either make the custom field available to all projects or choose all relevant projects that will be used for assigning issues to swimlanes.
In the next step, make sure to add this field to all relevant "edit issue" screens so that it can be edited when using the app.
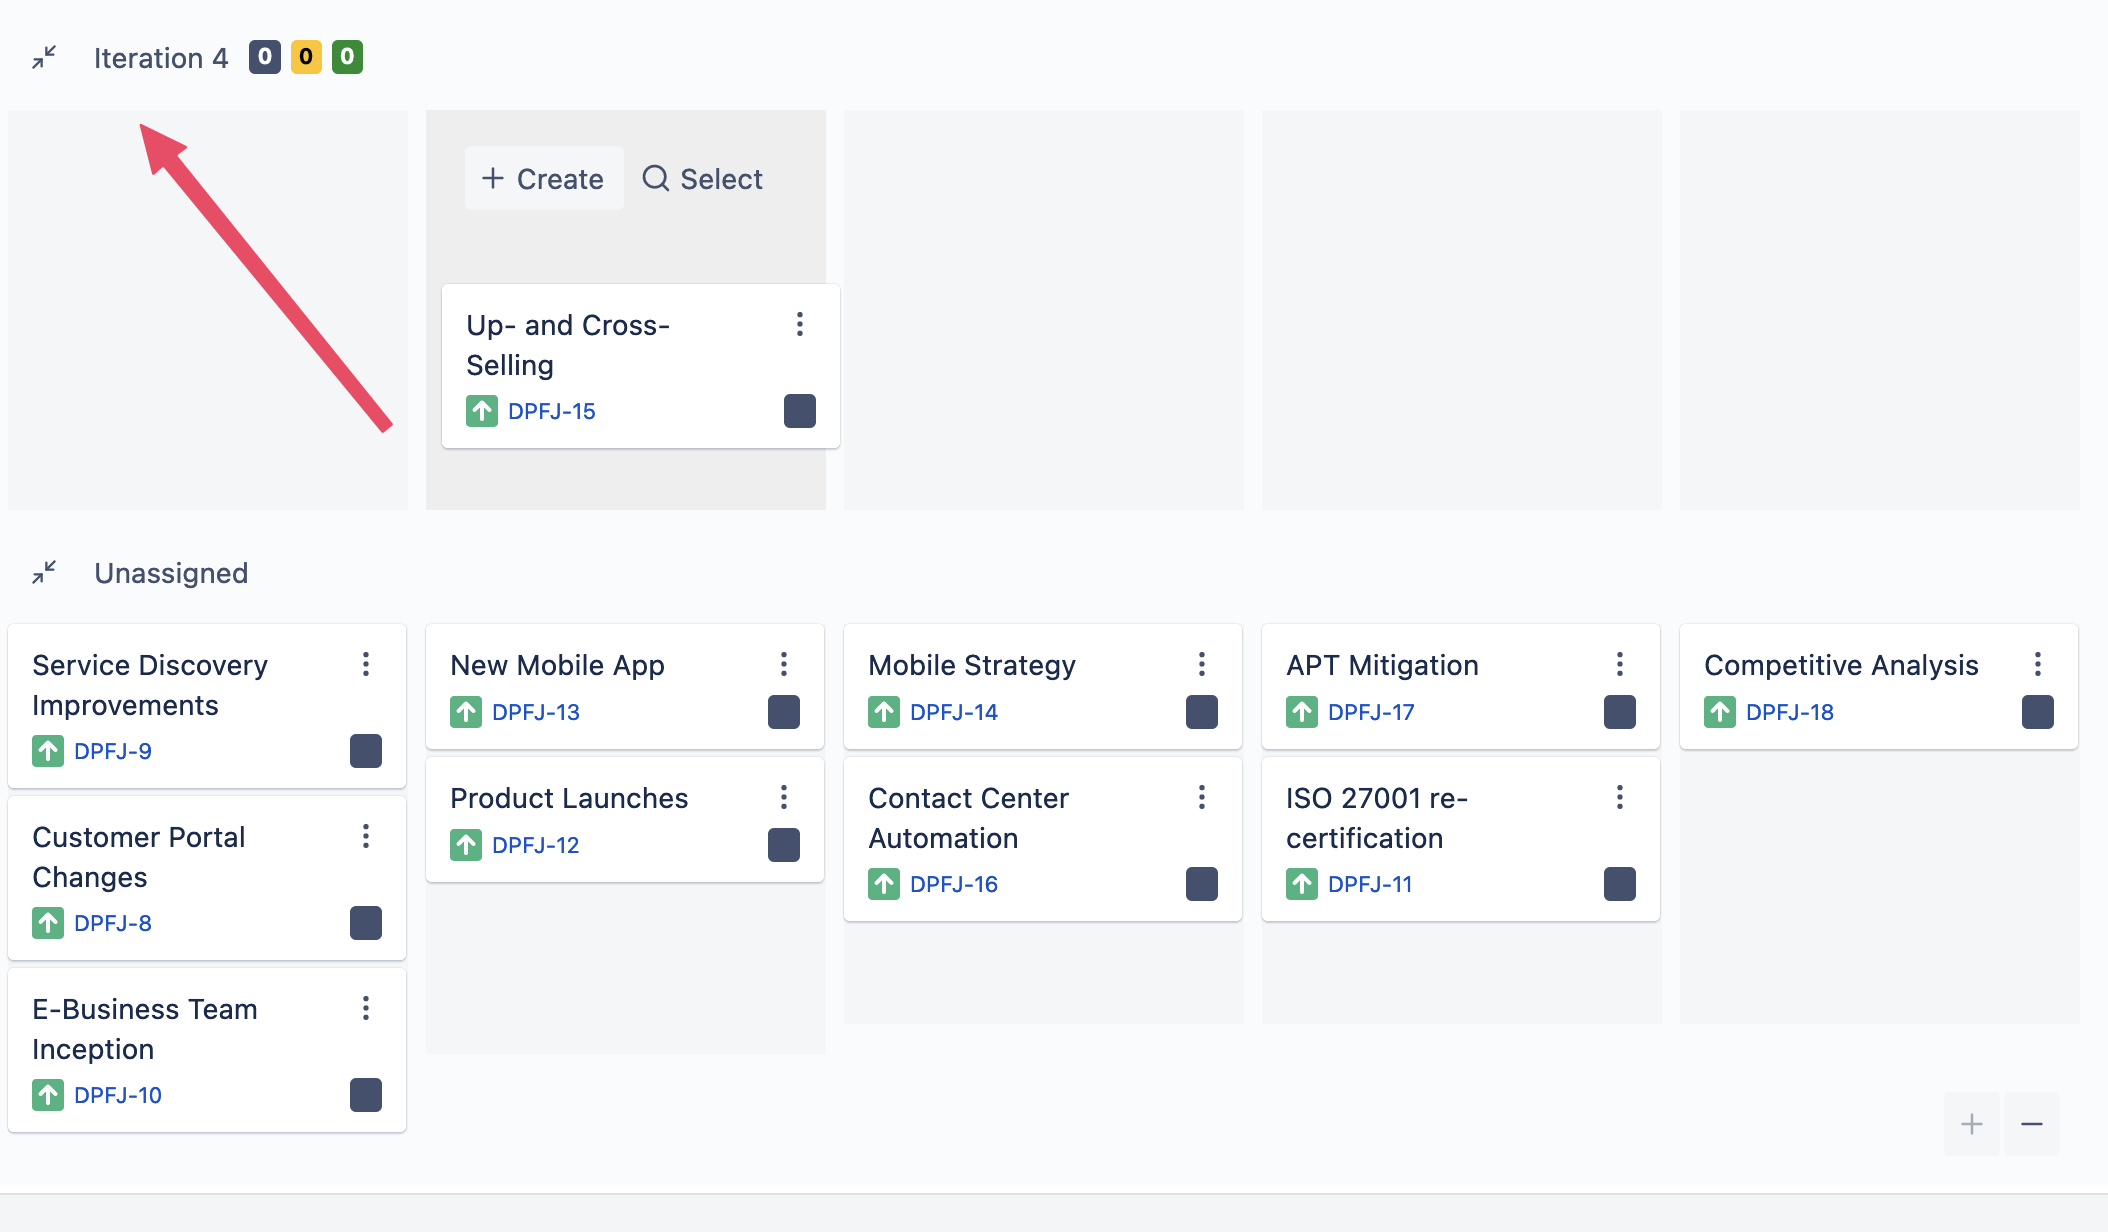
Adding the custom field to the map
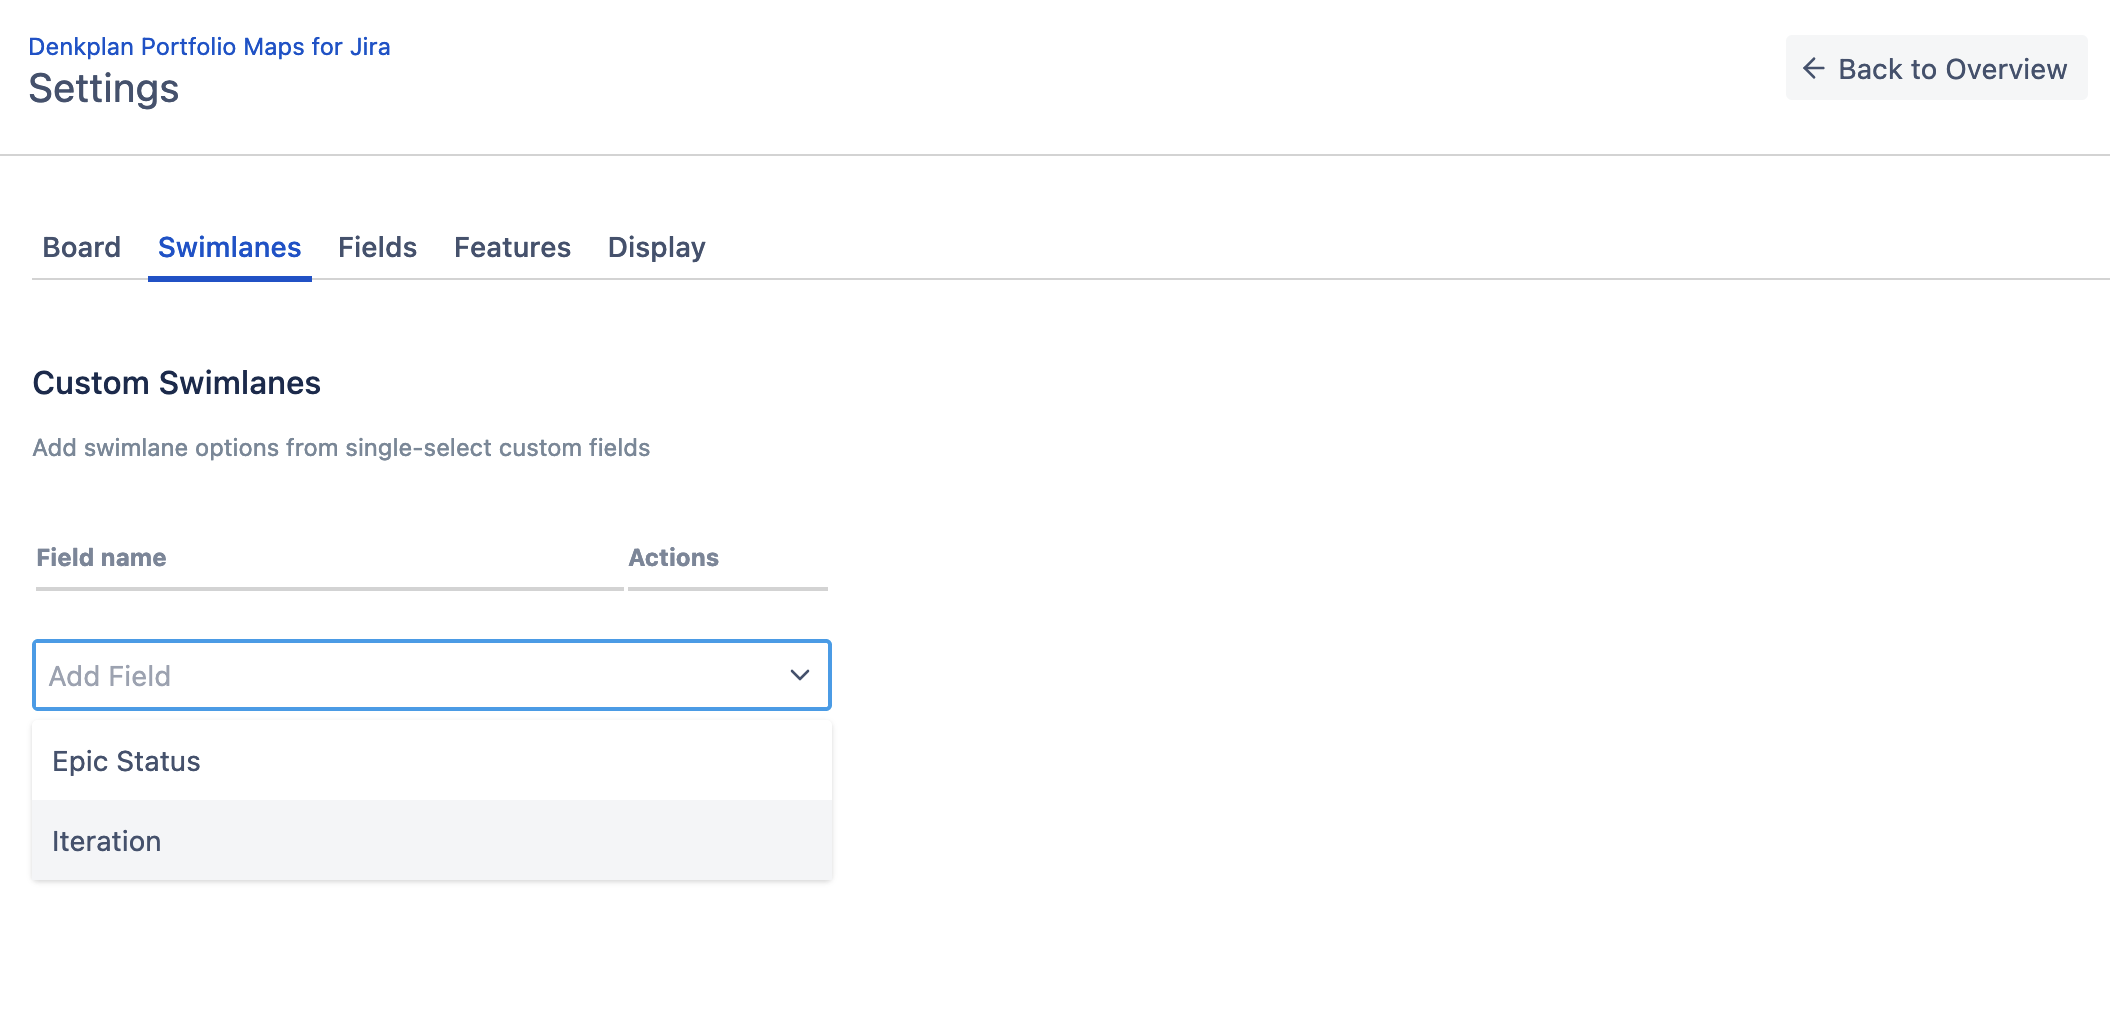
Go to the settings via the "..." menu in the top right-hand corner. Select Swimlanes. Then select your newly created field from the select list.
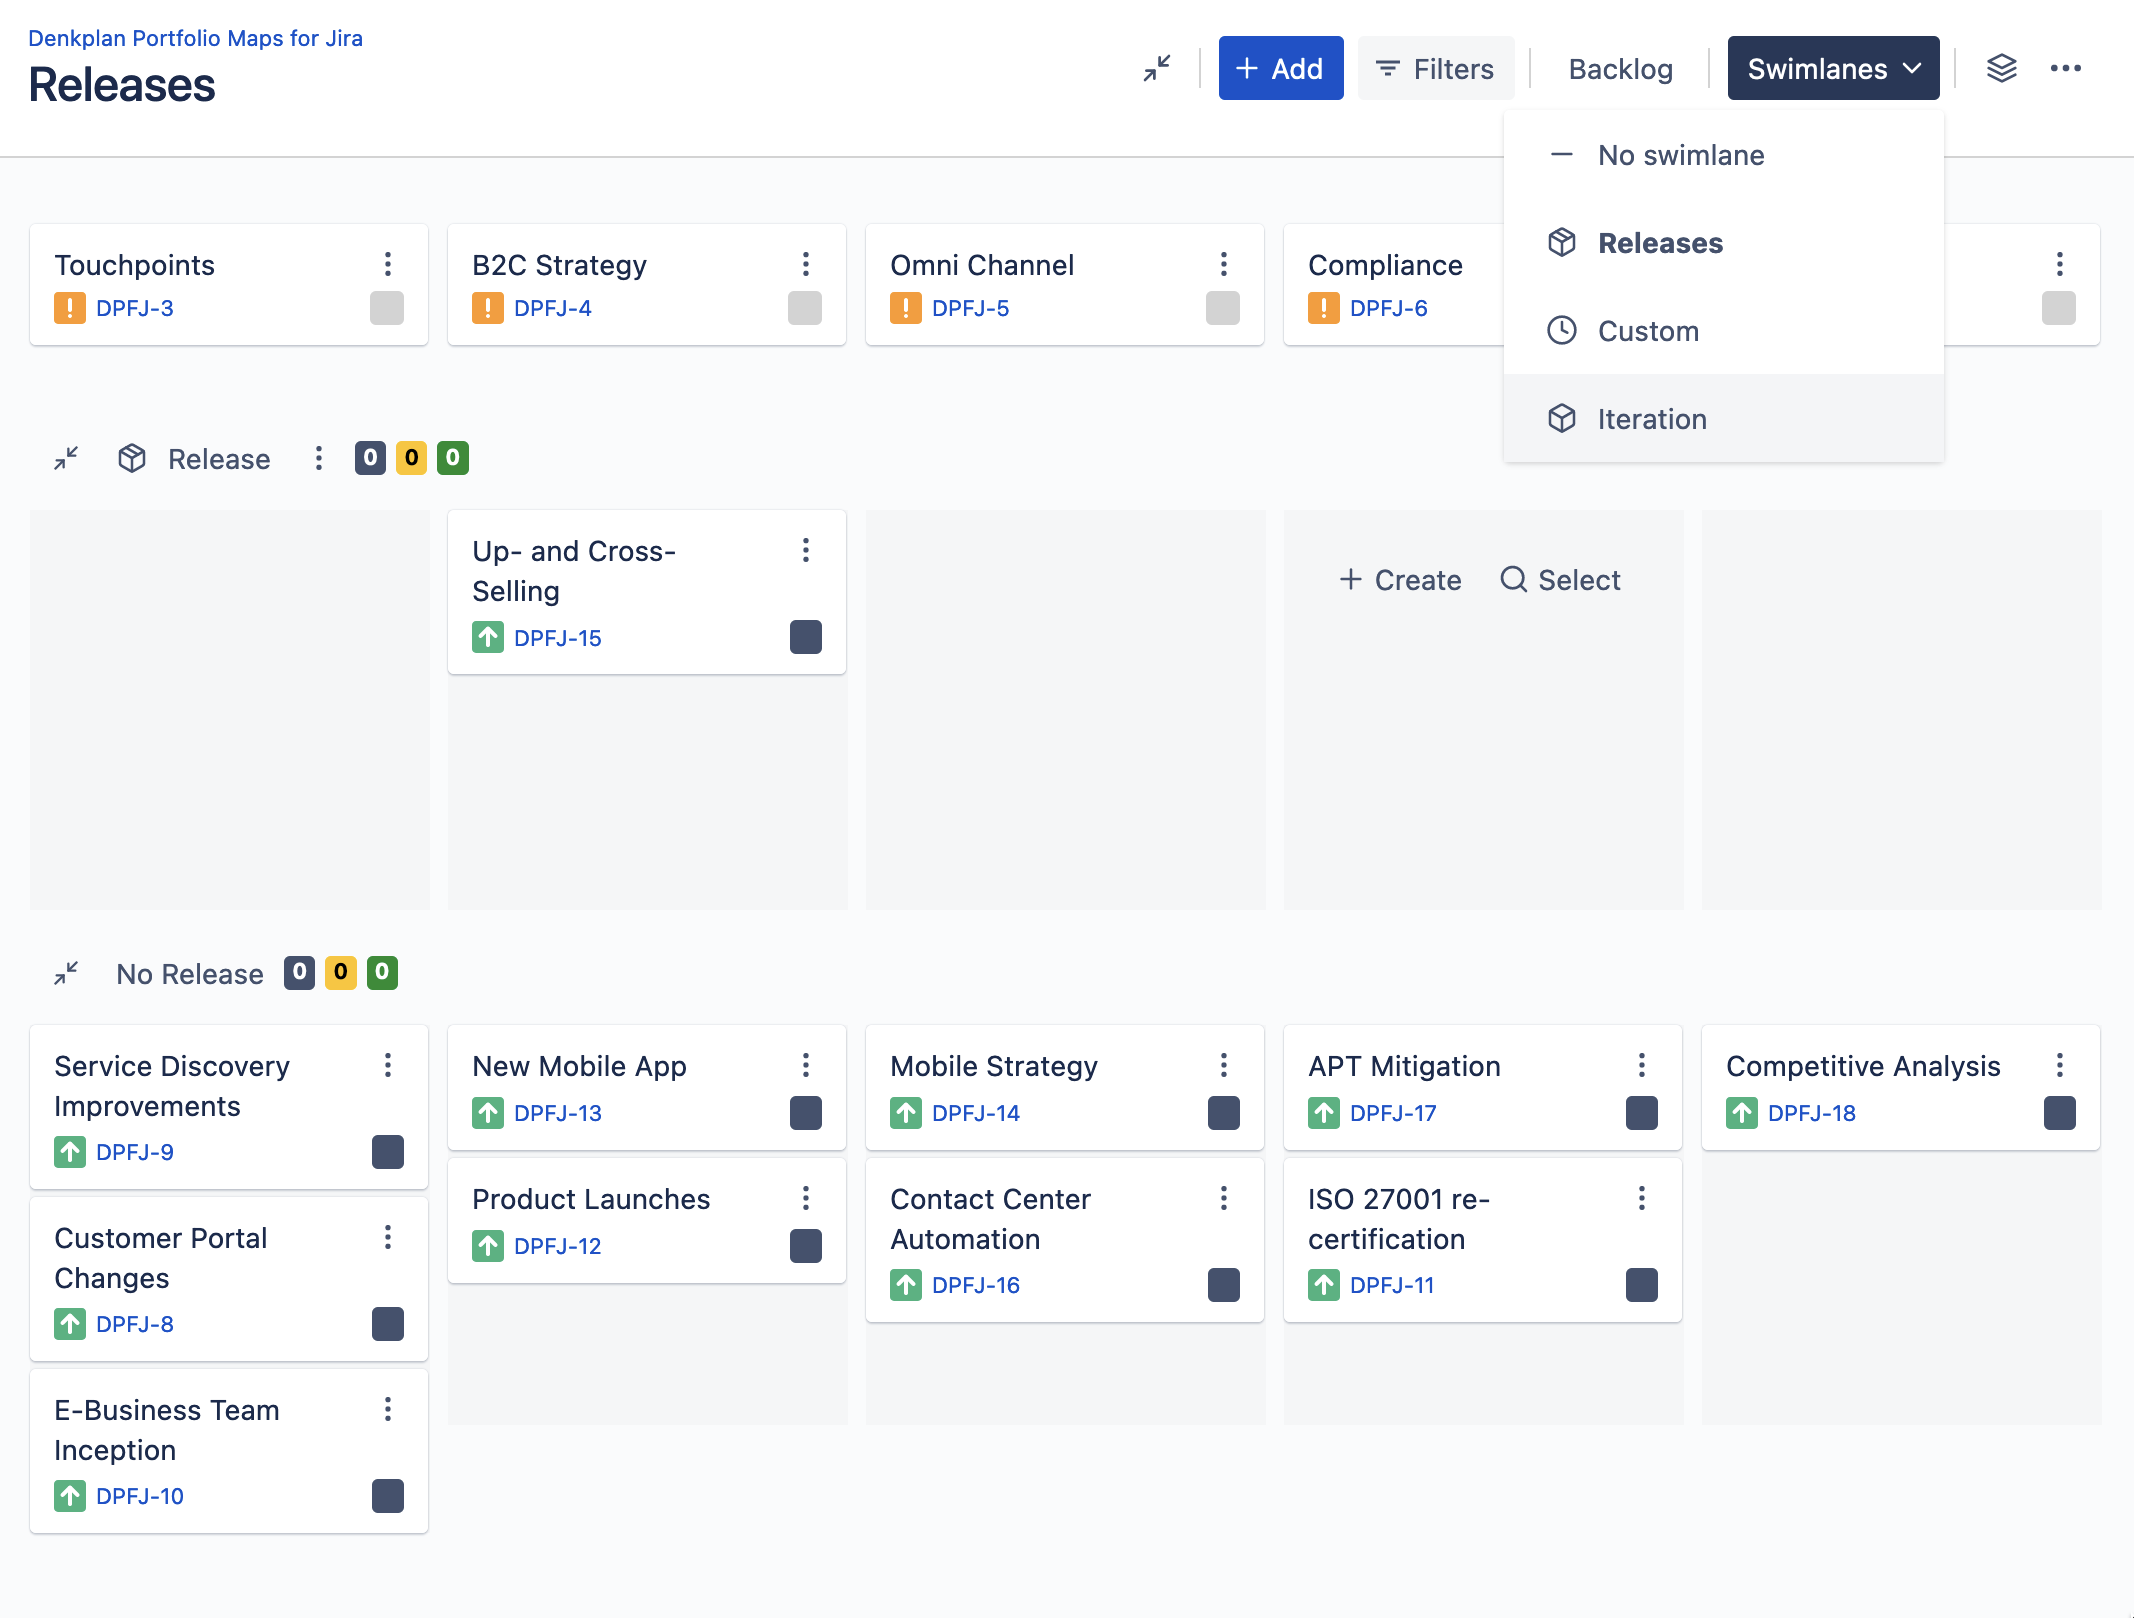
You can now go back to the map and select the custom field from the swimlane dropdown.
When you drag issues to the swimlane, the selected value will be automatically changed and the issue updated.